Did you know you can combine all related chats and documents into a particular section in ChatGPT?
- What Are ChatGPT Projects?
- How to Create and Use Projects in ChatGPT (8 Proven Steps)
- Step 1: Open ChatGPT
- Step 2: Open The Left Menu
- Step 3: Locate Projects
- Step 4: Create Projects
- Step 5: Access Your Project
- Step 6: Add Chats to Your Projects
- Step 7: Upload Files to Your Project
- Step 8: Add Custom Instructions to Your Project
- Final Words
Of course, you can.
That’s the feature we are looking into today: Projects in ChatGPT.
Let’s go.
What Are ChatGPT Projects?
The projects feature in ChatGPT allows you to group your chats, files, and custom instructions in one place. Sounds impressive, right?
How do you usually use ChatGPT?
You probably just start a new chat every day and upload some files when you have to.
But what if you want all the chats you have with ChatGPT related to a specific topic to be kept in one place?
I’m sure if you’re a freelancer, you’d love all their chats related to work, tasks, and guidelines to be kept in a section so they can easily find them later.
That’s exactly what the Projects feature does for you.
“But… I just checked my ChatGPT dashboard, and it isn’t there.” Is that what I heard you say?
The ChatGPT Projects feature is only for those users who use the premium versions of ChatGPT, not the free version.
So, if you’re using the free version of ChatGPT, you can use your own methods to organize your chats on the platform, but you can’t access the Projects feature.
If you’re a Pro user,whether you’re using an Enterprise or Individual account, you can access the feature.
Now, let’s go through how to start creating projects to organize your chats, files, and custom instructions.
How to Create and Use Projects in ChatGPT (8 Proven Steps)
Step 1: Open ChatGPT
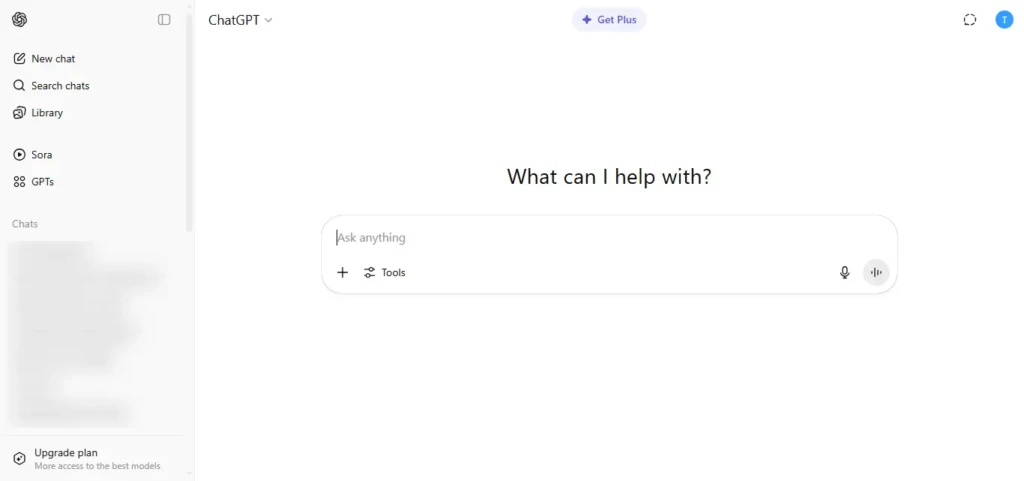
Go to the ChatGPT website on your computer.
Step 2: Open The Left Menu
Click on the menu icon on the top left corner of the page to open the menu.
Step 3: Locate Projects
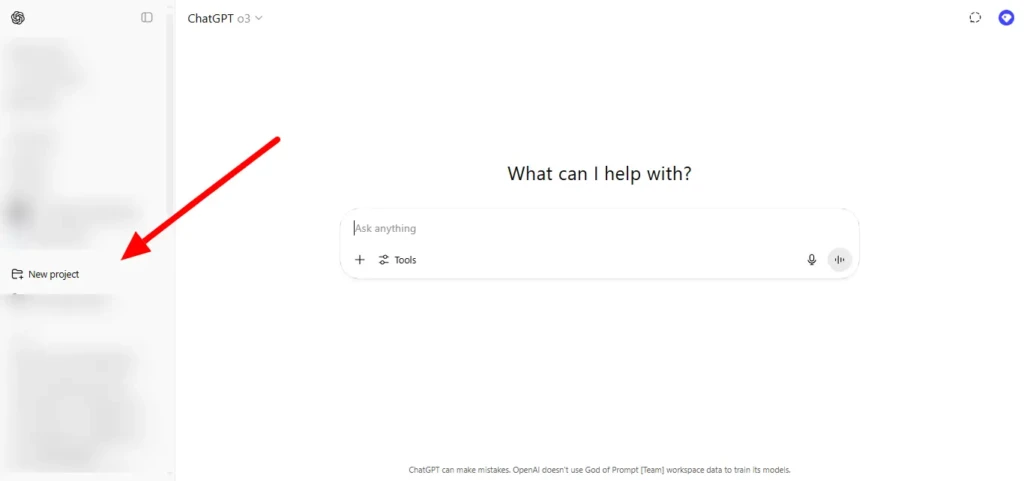
In the menu, you’ll see a particular section titled Projects. That’s where you will create your first project.
Step 4: Create Projects
Under the Projects section, click on New project. This will create a new project for you.
How do you add chats, files, and custom instructions? Relax, we’ll get into that later.
So, when creating your first project, give it a name. It helps to use a name that reflects what the project is about.
Like, if you’re going to put all what you do related to email marketing in there, then you should name it something similar to “Email Marketing.” Doing that will help you find it fast and with ease.
Step 5: Access Your Project
Now that you have a project, let’s see how to access the project you’ve just created.
You’ll find all the projects you’ve created under the Projects section in the menu.
So, just open your left menu with the menu icon as in the second step, and you’ll see all the projects under Projects.
You can access your project now. What’s next? Add items to your project to start organizing your work.
Step 6: Add Chats to Your Projects
You have two options here: Either to use the “move to project” feature or to start a chat on your project’s page. Let’s see how each works.
The first option is that you click on a particular chat that’s related to your project, and in the small menu that appears, you’ll see “move to project.” Click that option and move the chat to the project that’s right for it.
The second option is that you simply access your project, and start a new chat in it as you usually do when having normal conversations with the tool.
You’ve added some chats to your project. Now, what?
Step 7: Upload Files to Your Project
Isn’t this just the one you do when having usual conversations with ChatGPT? No, they’re not the same.
Here, you’re not uploading files to a chat; you’re uploading your files to the project.
So, on the project’s page, click on Add Files and then upload all the files you want to add to that project.
We’re almost done. We just need to add some custom instructions in our project, and we’ll be good to go.
Step 8: Add Custom Instructions to Your Project
In the final step, you’ll add custom instructions to your project. What are they? Custom instructions allow you to make ChatGPT’s assistance better by telling it more about the project and what it should focus on.
So, on the project’s page, click on Add Instructions, then add your custom instructions and start working seamlessly with ChatGPT on that project till it’s done.
That’s all about the steps you should follow to organize your work in ChatGPT.
Final Words
You’ve learned how to use ChatGPT Projects to organize your work. But, as I mentioned earlier, it’s a feature for the rich kids.
Only those with the Pro version of ChatGPT can access the feature and utilize it.
If you’re a free user, how do you see this? Can you upgrade to Pro just to use the Projects feature?


